Using the Micro:bit Radio to Send and Receive Sensor Data
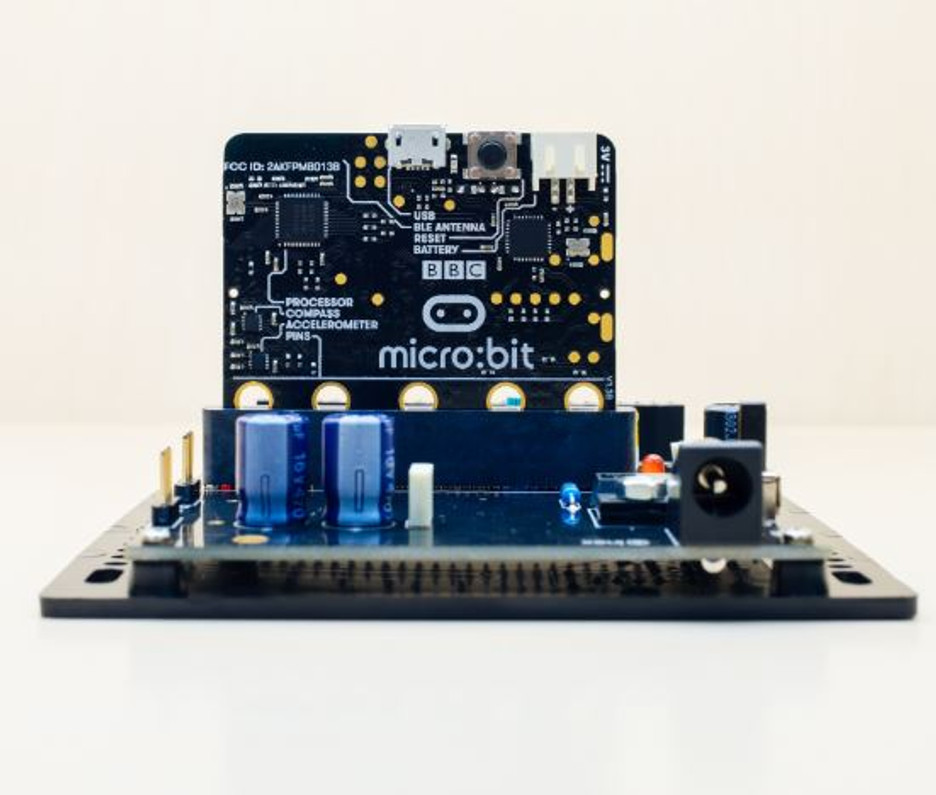
In this blog post I’m going to demonstrate the micro:bits radio capability. Have you ever wanted to know how cold your fridge is? Well I thought it would be interesting to find out so we took the following parts and got tinkering!
2 x micro:bit
1 x micro:pixel
1 x 1000mAh LiPo
1 x 6000mAh LiPo
3 x Alligator cables
1 x TMP36 sensor breakout
We then got to the programming, we did this in python and I use mu for the coding. You can download the code here.
The transmitter:bit
In this code we read the voltage from the TMP36 and convert this into the temperature then display it on the LED display and if a micro pixel is attached to this unit it will also change the colour depending on the temperature. We then switch on the radio and send the temperature as a string to any listening micro:bits then switch the radio off.
# Read and display the temperature
# and update the NeoPixel panel with
# a colour between Blue and Red, and
# send the data to any listening node
# (The micro:pixel panel is not needed)
# for WWW.proto-pic.co.uk by Drew Anderson
# import the libraries required by the microbit
from microbit import *
# import the libraries required by the micro:pixel and Radio
import neopixel
import radio
# We have 8x4 pixels, 32 in total on pin 0
np = neopixel.NeoPixel(pin0, 32)
while True:
# Read the RAW temperature
tmp = pin1.read_analog()
# Convert the RAW to a real Temperature
temp = ((tmp * (3300.0/1024.0))-500.0)/10.0
# Expand the scale for better display in micro:pixel
tempcolour = int((temp * 3.6))
# The next 4 lines constrain the colour value to 0 <> 127
if (tempcolour < 0):
tempcolour = 0
if (tempcolour > 127):
tempcolour = 127
# Show the colour on the micro:pixel
for pix in range (0 , 32):
np[pix] = (tempcolour,0,(255-(tempcolour*2)))
np.show()
# Show the Temperature to one decimal place
tempToShow = "{0:0.1f}".format(temp)
display.scroll(tempToShow)
# Turn on the radio
radio.on()
# Send the temp as a string
radio.send(str(temp))
# Let the data finish
sleep(50)
# Turn off the radio to save battery
radio.off()
sleep(50)
The receiver:bit
In this code we set up the micro:pixel then switch on the radio, once we've done this we listen for a signal and then take the string we receive and convert it to a float. Once we have that we do a little maths to increase the scale. We then display the temperature on the LED matrix and change the colour of the micro:bit depending on the temperature.
# Receive and display the temperature
# and update the NeoPixel panel with
# a colour between Blue and Red
# for WWW.proto-pic.co.uk by Drew Anderson
# import the libraries required by the microbit
from microbit import *
# import the libraries required by the micro:pixel board & Radio
import neopixel
import radio
# We have 8x4 pixels - 32 in total on pin 0
np = neopixel.NeoPixel(pin0, 32)
# Turn the radio transmitter on (Required)
radio.on()
while True:
# Read any incoming Data
inData = radio.receive()
if inData is not None:
# inData is a string - We want a float
temp = float(inData)
# A little bit of maths to extend the scale a bit
tempcolour = int((temp * 3.6))
# The next 4 lines constrain the value to between 0 and 127
if (tempcolour < 0):
tempcolour = 0
if (tempcolour > 127):
tempcolour = 127
# Update the micro:pixel
for pix in range (0 , 32):
np[pix] = (tempcolour,0,(255-(tempcolour*2)))
np.show()
# Show the temperature to 1 decimal place
tempToShow = "{0:0.1f}".format(temp)
display.scroll(tempToShow)
Hook up guide:
First up slide one of the micro:bits into your micro:pixel.
Next up connect the larger capacity LiPo to the micro:bit.
We then connect up the TMP36 up to the other micro:bit 3V to VCC, GND to GND and Pin1 to TMP.
Finally we plug in the small LiPo into this micro:bit and you're all done!
In action video:
LINKS:
Example code
Recent Posts
-
What is Ohm's Law?
Are you curious about how electricity works? Let me introduce you to a very important concept i …9th Mar 2023 -
How do I control a central heating system using an Arduino
To control a heating system using an Arduino, you will need to write a sketch (program) that impleme …7th Feb 2023 -
The Versatility of Slotted Aluminium Extrusions: From Robotics to Camper Van Renovations
In today's ever-evolving world, the need for versatile and adaptable building materials is greater t …25th Jan 2023


